This is the third of three posts detailing how to create new users in a Hybrid environment. In this case, it was Exchange 2010 on premise, Hybrid to Exchange Online, with ADFS / DirSync, and SSO. There was some confusion with the Help Desk staff on how to manage their environment going forward, so I created this documentation for them. This procedure has worked well going forward, so I thought I’d post it in case anyone else found it useful.
In case you’ve missed them, here’s part 1, and part 2.
Creating a new user (copying an existing user)
It’s fairly common practice when creating a new user in AD to simply make a copy of someone who has similar permissions, or a similar role – it’s easier to get all their groups and permissions added, and less chance of missing something. If you want to be able to copy an existing user when you’re connected to Office 365, you can still do it – you just need to use a little bit of PowerShell after the fact to enable the remote mailbox.
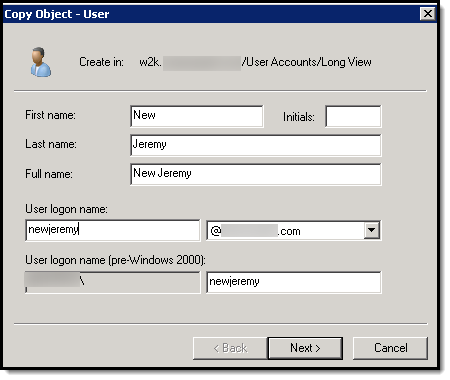
In AD, copy the user account whose permissions you want to match:


Fill in your details as normal, and click Next:
Password, and then Next again:

And click Finish, and you’re done:

The next step is to enable their remote mailbox, so that they get properly provisioned for Office 365. Open the Exchange Shell and run the following command:
Enable-RemoteMailbox newjeremy -RemoteRoutingAddress newjeremy@domain.mail.onmicrosoft.com
Make sure to change the identity and the remote routing address to match the username of the user you’re creating.
If you get this error when you run the command in PowerShell:

It’s because the user that you copied from is still on premise, so it’s expecting the Exchange GUID to be in the attributes – fire up the old Attribute Editor in ADUC:

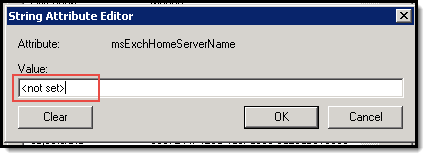
We need to remove the attribute for the msExchangeHomeServer, since we want that to be set to the cloud, not on premise:

The trick of course, is that you can’t delete it – otherwise you’ll get an error when you try to save your changes. Simply change this:

To this:
And then try running the command again – if that was the only problem, it should work properly this time.

Go ahead and force a sync if required, or wait for a few hours for the account to show up online:
You can manually push a sync of the directory by going to the DirSync server, and performing the following steps:
- Open PowerShell (Run as Administrator)
- CD to “C:Program FilesWindows Azure Active Directory Sync”
-
Run .DirSyncConfigShell.psc1

-
Type in Start-OnlineCoexistenceSync and hit Enter.

Go back to Office 365, and the user should show up now: – click on the new user to activate their licenses and a mailbox:
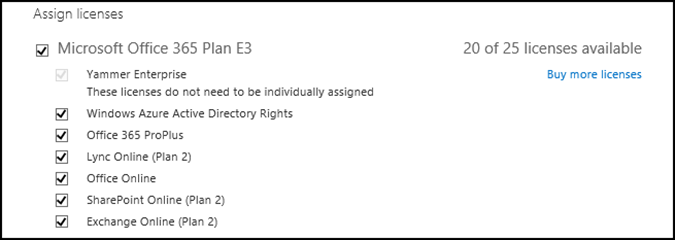
As I mentioned before, the only license required to assign a mailbox to a user is an Exchange Online Plan – Office 365 still maintains the granularity that allows you to give users only what they need / is assigned to them. Of course, if you need your users to have all the Office 365 options, just click the plan name at the top, which will check all the boxes underneath.
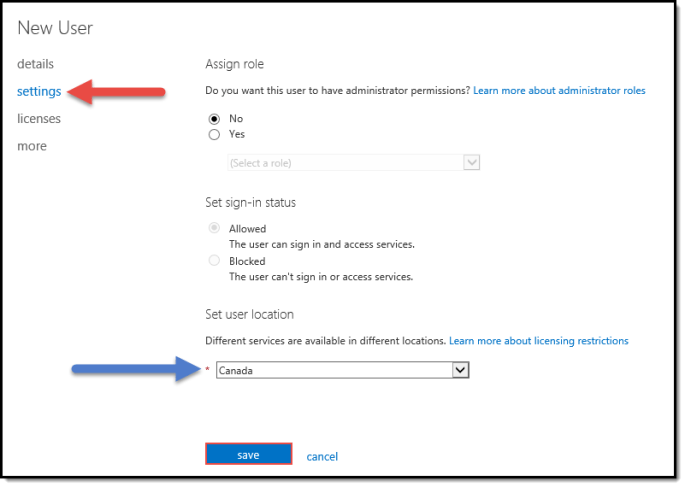
Next, click on settings, and set their location, then click Save.
It’ll take a few minutes for their mailbox to provision in the cloud – once it’s fully provisioned, you can go ahead and connect their account to Outlook.

You can try out a new app to solve this exact problem. It is called User Copy Assist. It will allow you to copy an AD user, Activate in exchange, sync to Azure, and even allow you to assign Office 365 licenses.
LikeLike