
Security & Compliance – eDiscovery for the win
I recently ran into a situation where I needed to export all the Sent Items from a number of mailboxes within a very specific date range – we needed to export these items so that they could be ingested into a journaling mailbox later.
Since you can’t directly export a mailbox from Exchange Online, the best way to make this happen is to do an eDiscovery search from within the Security and Compliance Center. Once you have your search parameters defined, you can export them all as a single PST, or as multiple PSTs (one per mailbox). Since we would later be ingesting these sent items into a Proofpoint journaling archive, this was the option I chose.
Required Permissions
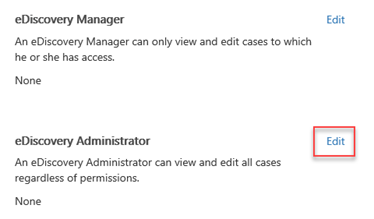
In order to perform these searches, you need to be at least an eDiscovery Manager – I went with eDiscovery Administrator in this instance, as it gave me all the permissions I needed. The eDiscovery Manager role would work fine if someone else were assigning cases to me to work with, but since I was doing the whole thing here, I just went with the greater permissions level.
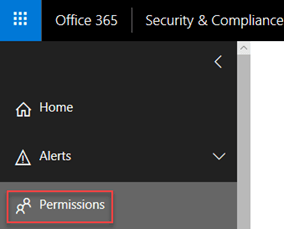
Start out by giving yourself (or the account that needs to perform this export) permissions in the Security & Compliance Center:
Click on the eDiscovery Manager role to edit it:

As I mentioned above, you can assign the eDiscovery Manager role to the person who needs to be able to perform these searches if you want to keep the permissions as contained as possible – since I was the only one working on eDiscovery in my tenant, and it was ok for me to see all eDiscovery cases, I just went with the eDiscovery Administrator.
Here’s the breakdown of the differences between the two roles:
Members (of this role group) can also create and manage eDiscovery cases, add and remove members to a case, create and edit Content Searches associated with a case, and access case data in Office 365 Advanced eDiscovery.
An eDiscovery Administrator is a member of the eDiscovery Manager role group who has been assigned additional permissions. In addition to the tasks that an eDiscovery Manager can perform, an eDiscovery Administrator can:
• View all eDiscovery cases in the organization.
• Manage any eDiscovery case after they add themselves as a member of the case.
So just remember – an eDiscovery manager can manage cases they’re assigned to, but an eDiscovery administrator can assign themselves to any case an manage it. Now that we’ve gotten that out of the way, let’s move on.
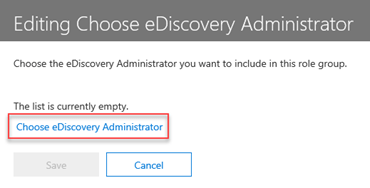
While editing the role group, click Edit to add someone as a Manager or Administrator:
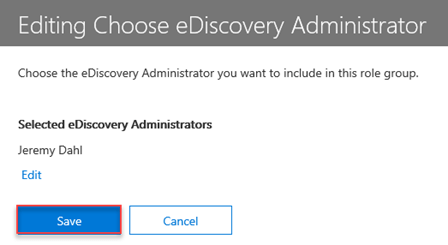
On the next screen that opens up, click on the Choose eDiscovery Administrator link to add someone to this role group:
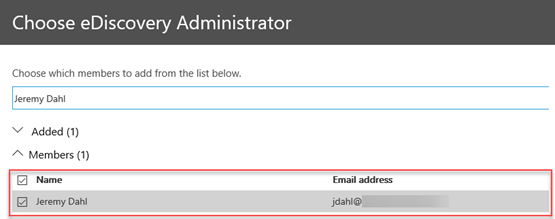
Pick your user from the GAL, and select their name to add them to the list:
Click Done, and then Save:
Creating a new eDiscovery search:
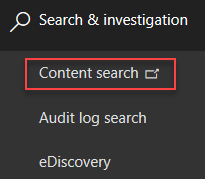
Now that you have the permissions you need to run your search, head over to Search and Investigation – Content Search:
You can obviously create and edit searches both through the GUI and the Shell – we’ll start with the GUI, and head over to the Shell afterwards.
Click on +New search:

Clicking on New Search will open your search query window so you can start editing directly – a Guided Search will open a wizard to walk you through your options, and searching by ID List requires you to upload a list of Exchange IDs to search against. For what we need to achieve here, we’re just going to be doing a regular search, and applying some logic and filters to get exactly what we need to export (Sent Items within a date range).
Refining your search query:
Now that we have a new search created, we need to go ahead and refine our search query to get the results we need. In the query window, start by removing the keywords condition, and then adding a new one:
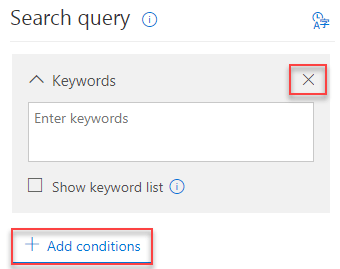
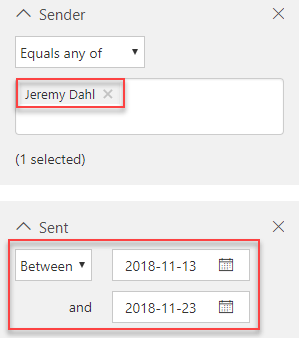
For this search, we’re going to use two conditions: Sender and Sent

(For a full description of all the keyword queries and search conditions available, check out the Microsoft Docs here.)
The Sent field is going to give us our date range option, and our Sender field is going to identify the emails that have been sent by those specific people.
The Sender field does not allow for you to add multiple people at once – which is why we’ll be switching to PowerShell shortly – you can easily add people one at a time by typing their names in, resolving them in the GAL, and then clicking on their names to add them. If you need to search against multiple people, this is going to drive you crazy, so we’re going to update that through PowerShell instead.
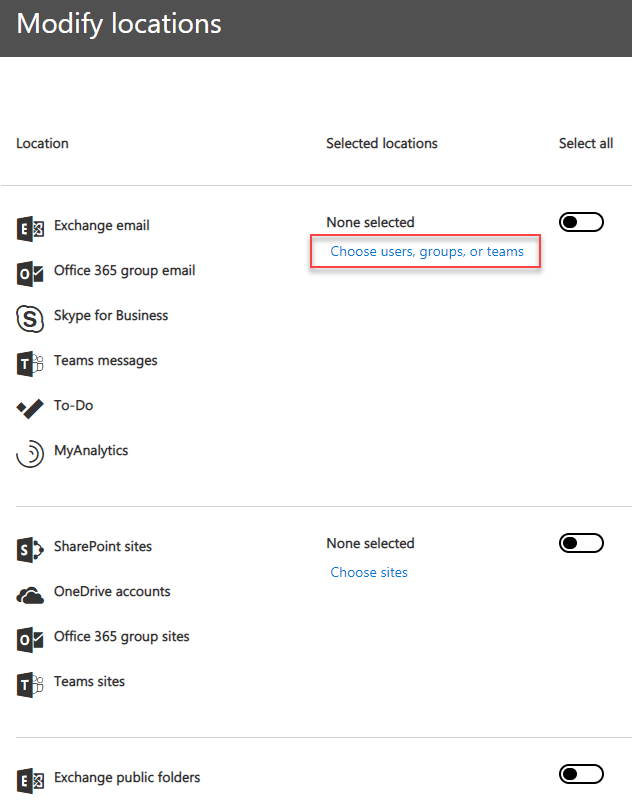
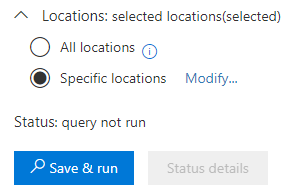
The last thing to do before saving your search query is to choose the locations you want to search against:
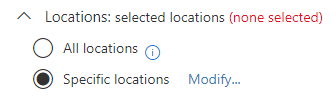
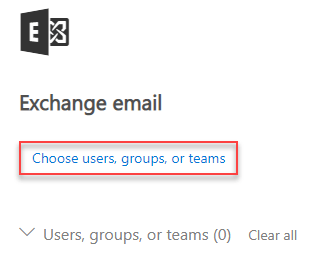
You obviously have a number of options here, depending on what it is you’re trying to get done – since this scenario requires a specific scope, we’re going to narrow this down to only searching in specific user’s mailboxes. Click on the Choose users, groups, or teams option to select your mailbox locations:
Next, click Choose users, groups, or teams:
Once again, you can type people’s names in individually and select them from the list – but that’s not the kind of people we are, is it now? 😉
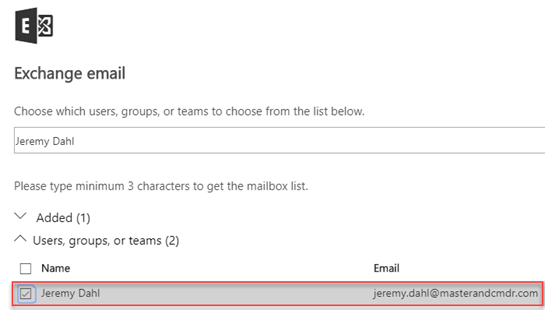
I’m just going to go ahead and set my first location, and then edit the list through PowerShell. Click Choose, Done, then Save.
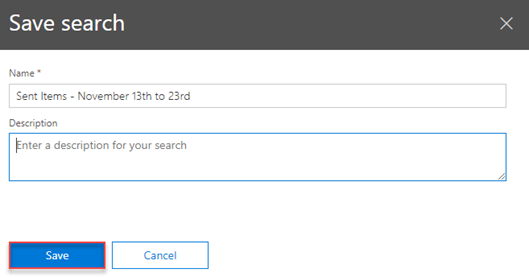
Lastly, click Save & Run, and let’s head over to PowerShell:
You’ll be prompted to name your search at this point – just go ahead and give it something easy to recognize so you can find it through PowerShell later.
Need more Power(Shell)!
Ok, now that our search is running, let’s bring it up in PowerShell and edit it – note that you could easily have created your search from within PowerShell if you wanted to, and in fact you might find that way easier… up to you. Start by getting connected to the Security & Compliance Center admin shell.
From here on in, I don’t have a shiny script that will do this all for you, but I’ll show you the commands that I run to give myself some more control over the whole process here.
Let’s start out by creating a variable with the name of our Compliance search:
$cSearch = “Sent Items – November 13th to 23rd”
Next, I want to confirm what my current search parameters are, so I have a baseline to go back to if I mess up, and also just to see what the language looks like:
Write-Host “Original Search Query:” -ForegroundColor Yellow
Get-ComplianceSearch -Identity $cSearch | Select -ExpandProperty ContentMatchQuery
This is what we get:

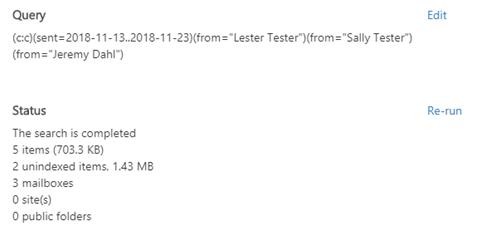
The (c:c) is the equivalent of an AND operator, and then we have our from field, and the sent field – identifying the date range and the senders in question.
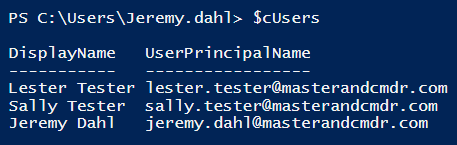
Ok, now we want to go in and add a bunch of users – in this case, I’ve created a CSV file that contains two columns: DisplayName and UserPrincipalName. I used these ones specifically so I can target these users for different things. Let’s go ahead and import those users as a variable:
$cUsers = Import-Csv .Desktopcompliance-users.csv
Now that we have our users ready to go, we can start editing our query:
Since we know we want to keep our date range as is, we’re going to store it in a variable so we can build on it:
$daterange = “(c:c)(sent=2018-11-13..2018-11-23)”
Now comes the fun part – we’re going to run a foreach loop on our $cUsers variable, and add each user to the query – many thanks to my homie and partner in crime Brendan for helping me with my string manipulation here:
# Update Search Query to include emails sent by specific users:
foreach ($c in $cUsers){$query = $daterange += “(from=””$($c.DisplayName)“”)”}
And then I’ll just check to see how my query has changed:
Write-Host “Updated Search Query:” -ForegroundColor Magenta
$query
Voila!

Now, you’re obviously not going to necessarily use PowerShell if you really only needed to add three users – but this will definitely come in handy if you’re adding tens or hundreds of users to your query.
Next, let’s update our Compliance Search with our new query, and get it started:
Set-ComplianceSearch -Identity $cSearch -ContentMatchQuery $query | Start-ComplianceSearch
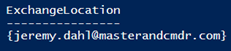
So far so good… however, you’ll remember that we want to find all the sent items in a set of mailboxes, and when we set this search up, we only added a single mailbox to the search locations.
Get-ComplianceSearch -Identity $cSearch | Select ExchangeLocation
Let’s go back and fix that now:
foreach ($c in $cUsers){
Write-Host “Adding $($c.DisplayName) to the Exchange Search Scope”
Set-ComplianceSearch -Identity $cSearch -AddExchangeLocation $c.UserPrincipalName
}
Start-ComplianceSearch -Identity $cSearch
You can re-run your get- command to make sure that your search has updated correctly:

As before, you can start your search using the following command:
Start-ComplianceSearch -Identity $cSearch
And then use this one to check on the status of the search:
Get-ComplianceSearch -Identity $cSearch | Select Status
Now we can go back into the Security & Compliance Center and see what we find – note that our query has updated with all the changes we’ve been making in the shell:
Now that you’ve gotten your search results, you can go ahead and export them all to a single PST, export to a PST per mailbox, or just export the individual emails – depending on your requirements. As you can see, there’s a fair amount you can do from within the Security & Compliance Center, and using PowerShell gives you even greater control and flexibility in structuring your queries however you want.
Hope this helped – peace out!
