This is the first of three posts detailing how to create new users in a Hybrid environment. In this case, it was Exchange 2010 on premise, Hybrid to Exchange Online, with ADFS / DirSync, and SSO. There was some confusion with the Help Desk staff on how to manage their environment going forward, so I created this documentation for them. This procedure has worked well going forward, so I thought I’d post it in case anyone else found it useful.
Creating a New User
Start by creating a new user in Active Directory (as normal):
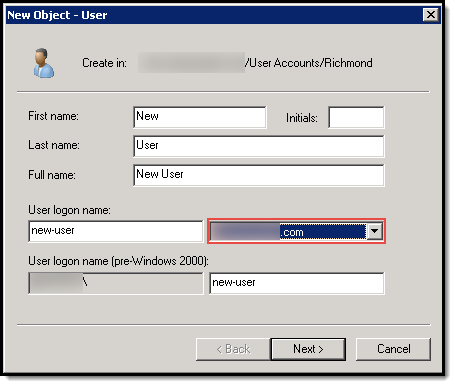
Make sure that the new user logon name is set to be their @domain.com suffix (basically, make sure they’re set to use their routable UPN, and not a .local domain) – if it’s @domain.local (or something along those lines), then they won’t get properly synchronized and require more steps to fix it later.
Specify whatever password settings you need to, and then click Next, and then Next to complete the user setup.
From here, you need to wait until the user account gets synchronized up into Office 365 – anywhere from 1-3 hours, depending on where you managed to jump in on the DirSync timer.

You can manually push a sync of the directory by going to your DirSync server, and performing the following steps:
- Open PowerShell (Run as Administrator)
- CD to “C:Program FilesWindows Azure Active Directory Sync”
-
Run .DirSyncConfigShell.psc1

-
Type in Start-OnlineCoexistenceSync and hit Enter.

Go back to Office 365, and voila!

Click on the new user to activate their licenses and a mailbox:
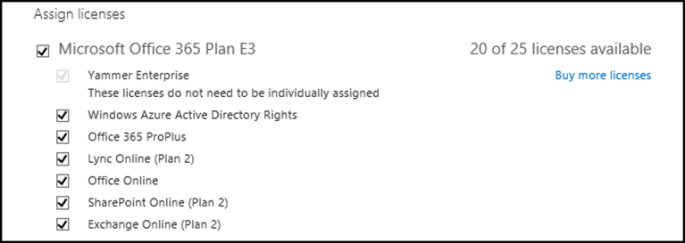
Note that the only license required to assign a mailbox to a user is an Exchange Online Plan – Office 365 still maintains the granularity that allows you to give users only what they need / is assigned to them. Of course, if you need your users to have all the Office 365 options, just click the plan name at the top, which will check all the boxes underneath.
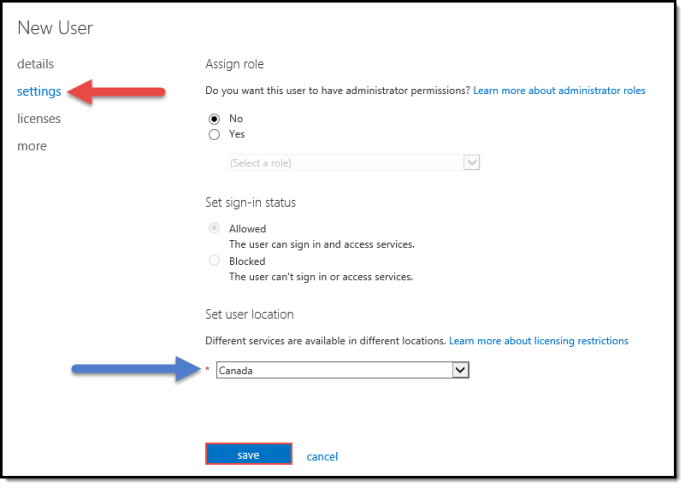
Next, click on settings, and set their location, then click Save.
The last thing you need to do is make sure that they have the correct email address assigned in Exchange Online. Click on the check box beside their name in the directory, then select Edit Exchange properties:

Click on email address and then double click on the email address you want to assign as their primary SMTP address:

Check the box to Make this the reply address and click Save

That’s it – you’re all done!

One thought on “Creating a New User (Office 365)”